

Hi friends!

It's about that time...we are getting ready for Halloween right now, but before you know it, it will be the holidays and with them will bring all the yearly greetings my family looks forward to so much!
We love seeing all the smiling faces in our mailbox every day.
But I have always struggled with a way to put some of those beautiful cards on display.
This year, I have made something I love, and I'm going to share it with you :-)
It involves supplies from three of my favorite places to shop - the Habitat for Humanity ReStore (or whatever similar place exists near you), the dollar spot at the craft store, and the home improvement store!

The ReStore near me was selling these cabinet doors for $1.00

I should have bought them all!
If you decide you want to make this project, I'd just call ahead to the place you're planning on going. Often times cabinet doors like these are in supply, but typically stock changes, so I'd call first. (That's another reason to start now, in case it takes a few weeks to find the right door.)
Then I hit the dollar section at the Michaels. They had a variety of pretty wood holiday themed words, again, for a $1.00!

At the home improvement store (or possibly the dollar store depending on what they carry near you) you'll want to pick up clothespins, twine, wood or craft glue, some screw-in eyes, and a hanger to attach to the back of the cabinet. Other supplies/tools I used included a pair of pliers and my Ryobi drill, to create a pilot hole for the eyes we'll screw into the front.
Think about your home and your holiday decor and you can make this look coordinate - paint it, distress it, Mod Podge some pretty paper on the inside panel. The sky is the limit.
I sanded my edges a little bit, and left it alone.


I cleaned my door with some plain white vinegar - a good natural degreaser.

I grabbed some of our old Christmas cards, that are 5x7 - that seems to be the largest size we typically receive. The cabinet door I bought is roughly 17" wide by 23" long. I laid out the cards the way I liked (don't stress over this - it's a holiday card display, not going in the Smithsonian. :-) and marked the spots where I wanted the eyes to go with a pencil.

The top two were about 5" from the top of the cabinet.

Drill your pilot holes (they should be slightly smaller than the actual eye you'll screw into them) and using the pliers, twist the eyes into place. You'll want to leave room above the place where the eyes are placed, because the tops of the clothespins will stick out above that.

Mark the next spot where you want the lower row of cards to hang. Drill your pilot holes and screw in the eyes again.

Smile - this is SO easy!

Get your twine. Tie a double knot around the eye. Thread the twine through the other eye and pull it as tight as you can. Double knot. Trim.
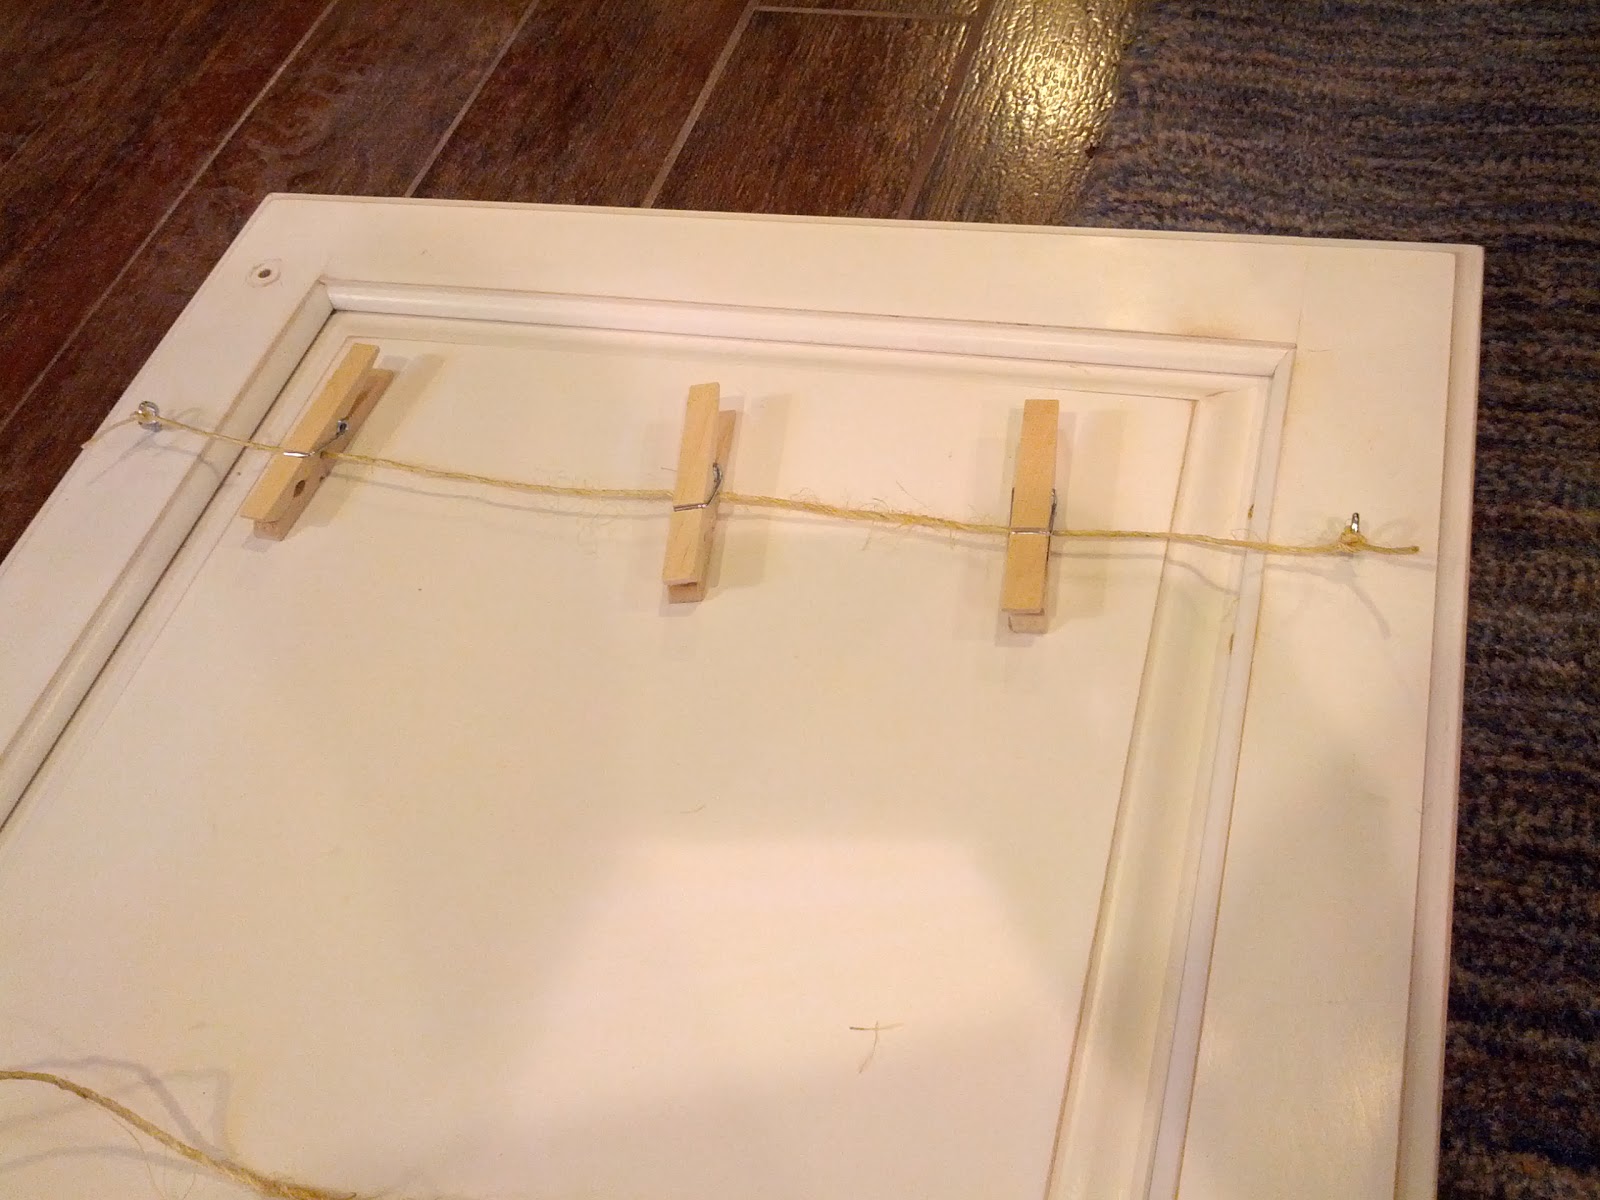
Repeat with the next set of eyes.

I grabbed my wood holiday word from the craft store,

and used some wood glue to add it on the top.


Add some hanging hardware to the back and find a special spot in your home for this.

I can't wait to start getting those holiday smiles in the mail because now I have a smile-worthy (and ridiculously inexpensive) place to show them off.

I'd love to see if you make a display door for your family.


Happy early holidays!!
Anne


