**Update** A big thank you and lots of love to Beckie at Roadkill Rescue, for featuring this little project. You can see it
here.
Mwah!

It may seem very small, what we home decor/artist/designer types do. But I have a little chair in my basement that makes me feel otherwise.
This little friend.
She was sad, alone, and definitely had seen better days.
I've had those days myself... anyone else?
I picked her up in parking lot of my favorite thrift store and added her to my collection.
Then I got the chance to go to the
Country Living Fair in Columbus, OH last fall.
Check out a video here:
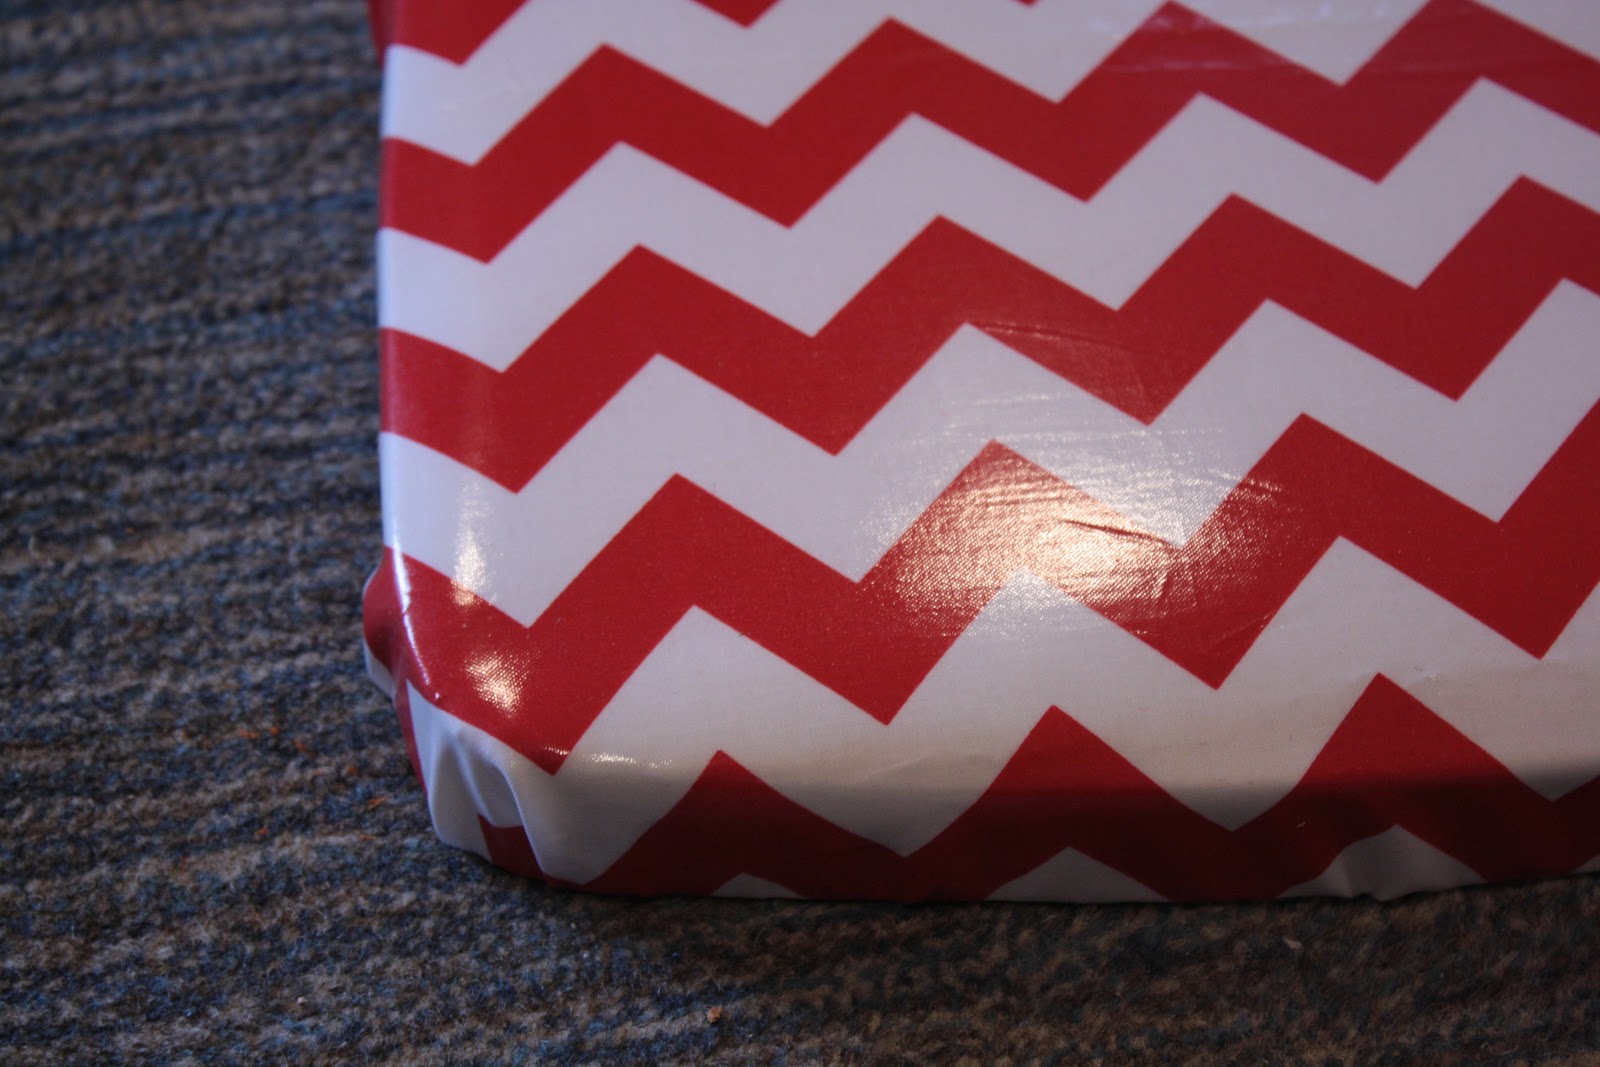
AWESOME, btw. You should go. I grabbed up some sweet fabric at one of the booths there (darn it, I can't remember the name. I'll update if I do!) - a laminated cotton with a red and white chevron print. I didn't know where I would use it but who cares?! IT MADE ME SMILE. When I realized it would be perfect to recover my new chair, I went for it. This was an easy peasy project, made oh so simple thanks to the purchase of my
electric staple gun. You could probably do it in an afternoon. The chair came apart in two pieces. I simply unscrewed the back piece and then unscrewed the legs from the seat. The original label was still attached, and I love that so I laid it aside.
Then I peeled the layer of (paper?) off the bottom. It was basically disintegrating in my hands.
Next I took off the blue vinyl seat cover and added a new layer of batting for comfort.
Then I laid out the seat on my fabric - be sure to position it the way you want it. It can be kind of easy to confuse the front of the chair with the back of the chair when the seat is sitting there all by itself. The I started stapling the new fabric on.
This staple gun has been a lifesaver. (I'm not getting paid to say this - just my experience.)
I'm learning that upholstering anything is about art as much as it is about science. You just have to work with your fabric and see what looks best. I am absolutely not an expert on upholstering.
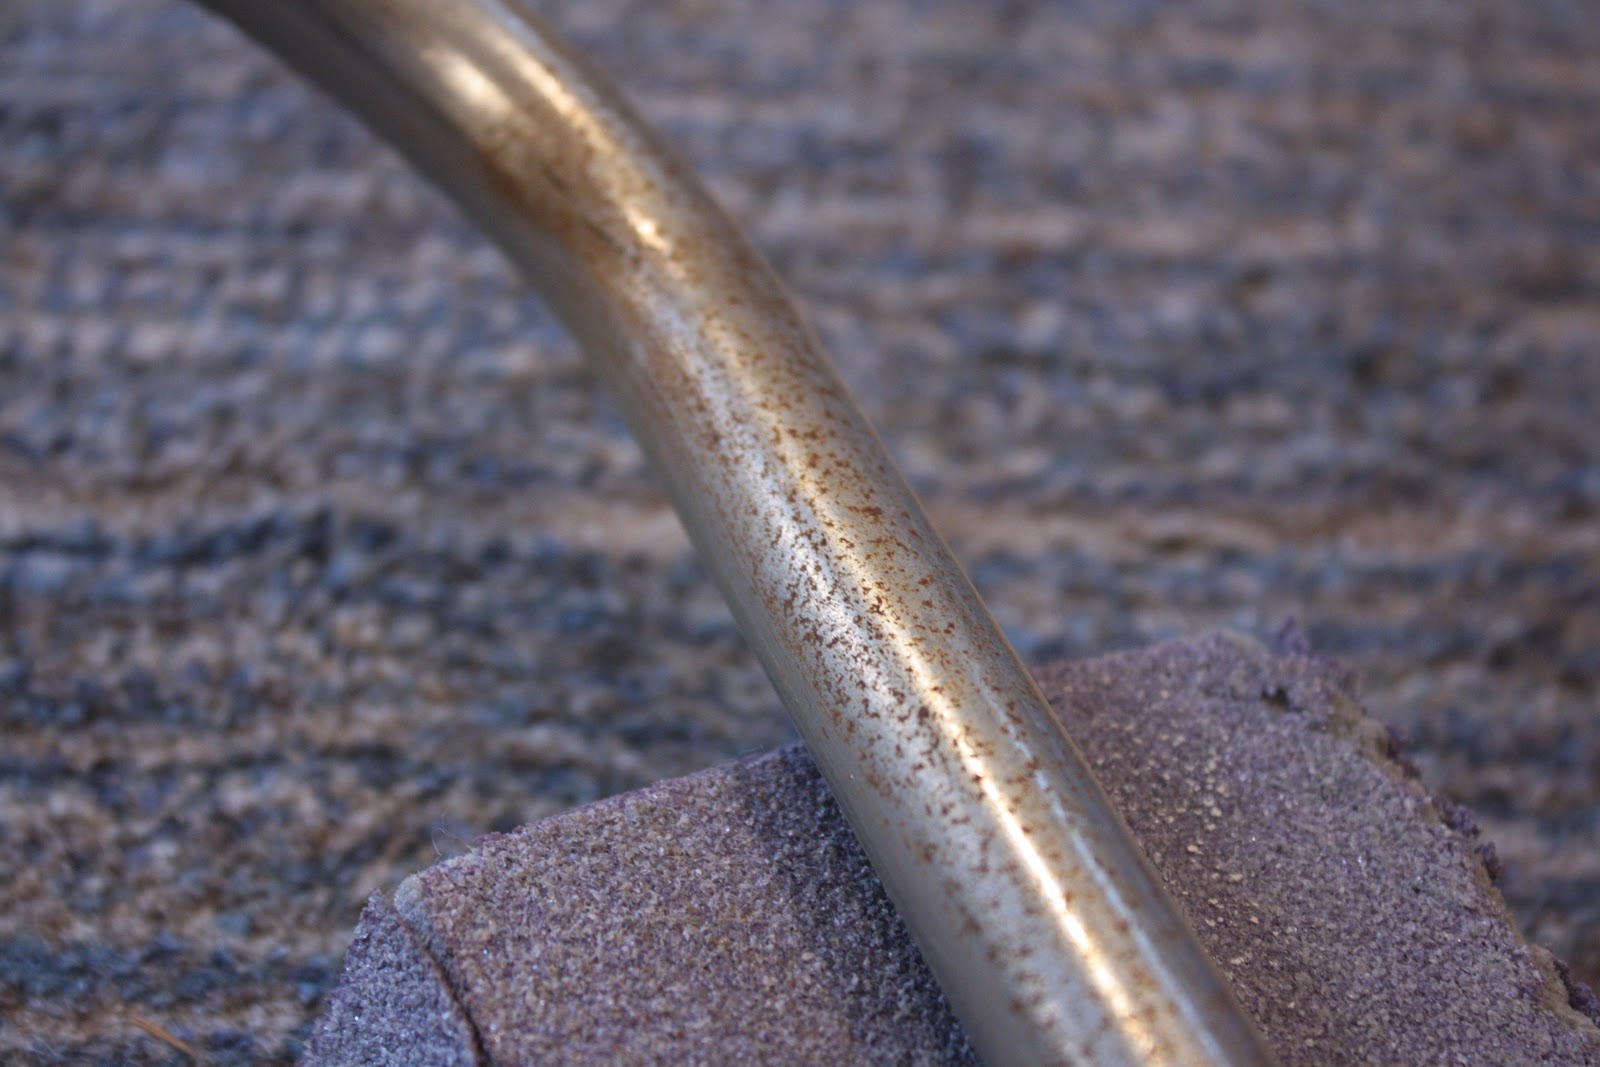
Wa-la! Now for the back and seat. They were rusty. I wasn't exactly sure what to do, so I just tried some fine grit sandpaper.
Worked like a charm!
Almost done... I had some black fabric that covers the bottom of upholstered furniture. So I cut a piece out and stapled that on the bottom of my seat.
Then I screwed the legs back on. The I knew approximately where the screw holes were, so I just felt around until I found them with my finger. I put the leg frame in place and started screwing it back on. The only slight hiccup was that the screws would "catch" on the fabric a bit, and it would start to twist and pucker around the screw hole. To fix this, I would turn the screw in a little ways then unscrew it some to loosen up the fabric. I repeated this until the screws were all in. You'll just have to keep an eye on it.
I took the original label and stapled it back on.
I screwed the back on, same as the legs.
That's it! This would be a GREAT first project if you are interested in tackling upholstery. There's a ton of good info out there with more expertise about how to do it well, so go take advantage of it. You can do it!!
Sometimes people tell me they're not creative. Here's what I think... you don't have to be
completely creative. You don't have to figure it all out yourself or come up with something no one else has thought of. There are SO many ideas, tutorials, how-to's out there... so pick one with a good step-by-step and give it a shot. YOU have to power to make things better... a castoff chair, a thrifted picture frame, a lamp. Pick something small and start there. It's a powerful message. That even when something looks unloved, it has the potential to be great. As do we all. It's empowering. And chances are it will make you smile. I know it makes me smile! This little beauty is going to the home of a friend, where it will be used by her adorable kiddos. Win. Win. :-)
XO, Anne


Looks amazing! Great job! :)
ReplyDeletehttp://dixie-n-dottie.blogspot.com/
Thanks! (Did I tell you my Grandma's name was Dot?)
ReplyDelete:-)